
The Hints feature has long been a cornerstone of Ancestry’s website and subscription service. If you’ve used their family tree for any length of time you are probably quite familiar with them. Easily accessible from just about any screen, Hints are always tempting us with new tidbits and records about our ancestors’ lives.
In their best form they act like a personal research helper, saving us time and connecting us with records we may have overlooked or simply never had the time to find. But, as powerful as this feature can be, it can also mislead the unwary researcher – causing confusion, incorrect assumptions and inaccurate trees.
It’s vital to learn how to use the Hints feature correctly, and with caution, to get the most from this powerful Ancestry tool. In this guide we will cover how to use the feature and explain what you need to do to avoid the most common problems associated with it.
You’ll find more help using Ancestry in our Ancestry Crash Course. The 21 lessons in this online course help you maximize your research, uncover new records and make the most of Ancestry hints in ways you may never have expected. For more sites that offer hints, such as MyHeritage’s Discoveries, see this article.
How to Access and Use Ancestry’s Hints the Right Way
To take advantage of the Hints feature you will need to have a tree (or some family history information) stored on Ancestry since they use the information in your tree to search for and present Hints to you.
However, if you choose not to host your tree on Ancestry you can still take advantage of hints. To do this simply create a family tree and make it private. Then, enter parts of your family tree solely for the purpose of getting hints. You will need to enter full names, birth, marriage and death dates, parents, children etc. The more you enter the more likely you are to turn up information.
Consider this a working research tree only and label it as such (ie Smith Working Incomplete Family Tree). Again, it is a good idea to keep this tree private so as to not confuse other researchers.
Use this tree to gather hints, reviewing the information carefully – as explained below – and then record the information in your preferred family tree program with sources attached. You can then decide to delete individuals from Ancestry you no longer care to research, or leave them up for future use.
Of course, you can also simply add your entire tree to Ancestry as well.
What Are Ancestry Hints?
Ancestry uses the information from your family tree to programmatically search their record collections and present possible records (and Member Tree) matches to you as Hints. It is important to understand that the Hints Ancestry suggests are just that, suggestions. There is no guarantee that a record that is presented as a possible match does, in fact, coincide with your person of interest. And, very often, they do not.
These record (and tree) suggestions are presented to you through the use of leaves in your family tree. An ancestor with a leaf means that a Hint or Hints is present for you to review. By clicking on the leaf you are brought to a page with every currently available Hint for that person.
As mentioned, Ancestry finds these possible record connections for you by searching their collections – but they do not search every single record collection they host. This is important to remember because it is easy to start relying on Hints for new information. It is vital that you take the time to regularly do your own searches, they are the backbone of your research.
There is no way of knowing for sure what record collections Ancestry does include in Hints, but it is clear that they rely heavily on census and vital records, as well as additional birth marriage and death record collections (although we have certainly seen many Hints from other collections as well.)
They also rely heavily on Member Trees but have separated these Hints out into their own section on the top. This is very helpful since tree suggestions must be considered in a different manner than other record collections.
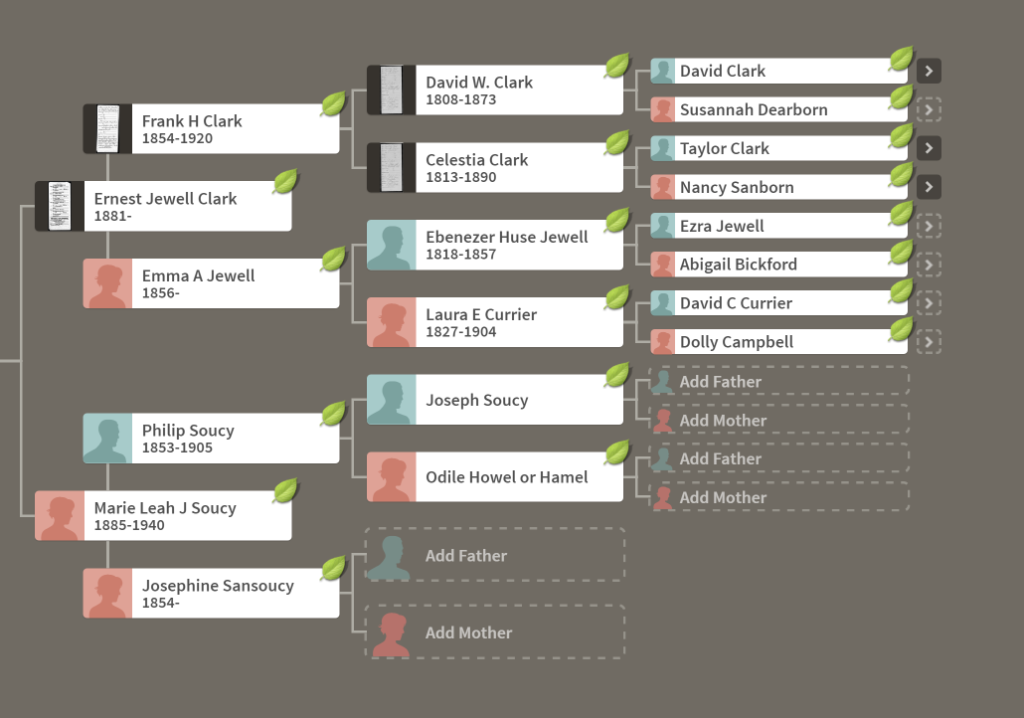
Here’s what a tree will look like when Hints are present.
Clicking on the name of a person opens up their preview panel and the number of Hints is shown.
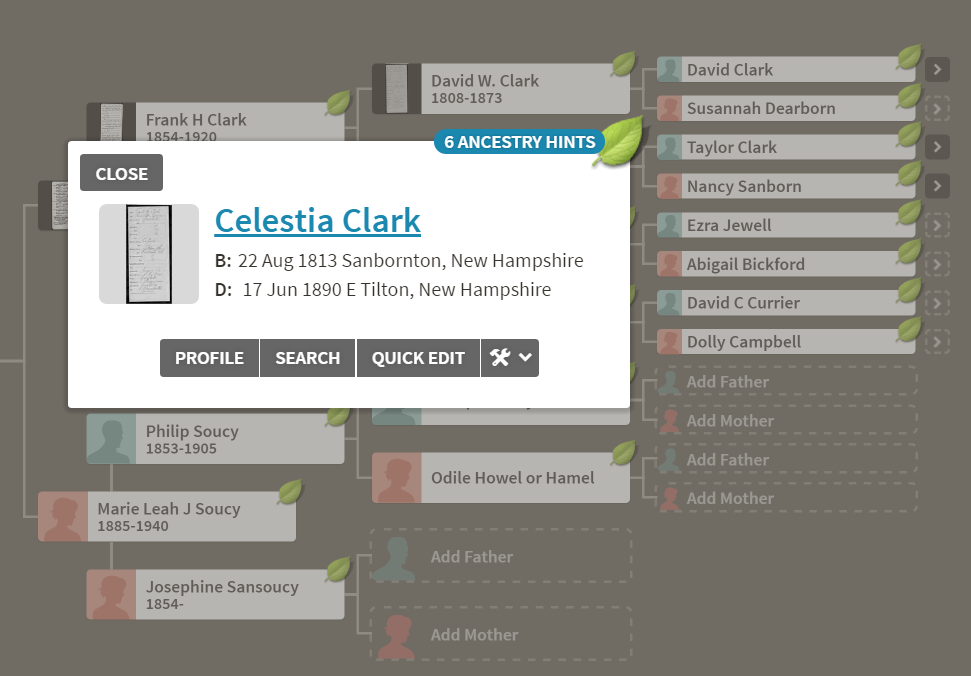
It is very easy from here to click on the blue text next to the leaf to view the hints for this person.
How to Use Hints Responsibly and Productively
This is where things start to get interesting. Once on the Hints page we can begin to review the information Ancestry has found for us and, hopefully, add some new details to our tree.
But this is also where we have to be cautious. The first thing to do when viewing Hints for a person is to make sure we have taken the time to familiarize ourselves with what we already know about the individual. If you have been focusing on the ancestor for some time you may not need to do this. But, often, we end up viewing Hints for someone we have not researched in awhile and we need to make sure that we know this person as much as possible before attempting to decide what information may actually match them, and what does not.
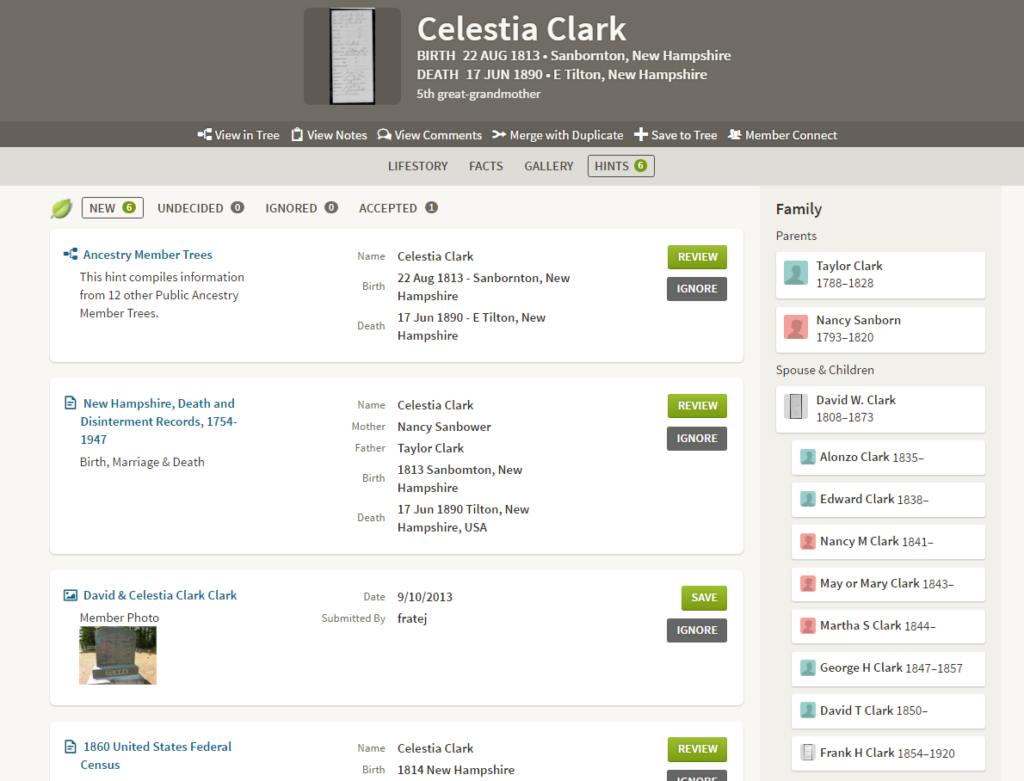
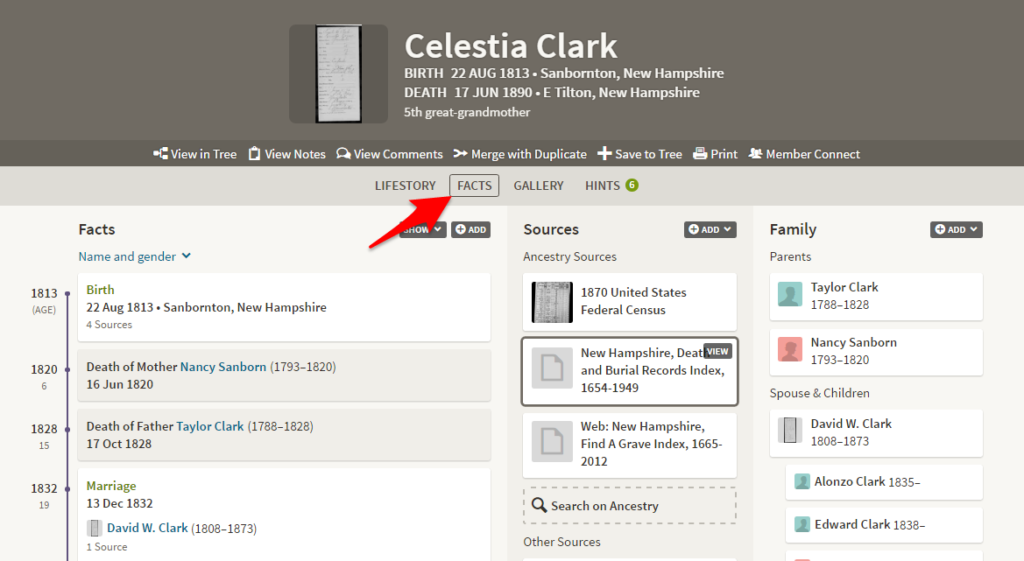
The quickest way to do this is to simply hop over to the Facts section on their profile page and review the details and documents we’ve already added. The individual below has several details and records attached so we will want to take the time to go over these. She also has a spouse and quite a few children added – we’ll review those people as well.
The more information we remind ourselves of the less chance we have of accidentally attaching a mismatched Hint.
It is a good idea to leave this Facts page open in another tab on your browser while reviewing Hints so that you can refer to it as you review records. This can be done on some computers by right-clicking or double-clicking on a link and selecting “Open link in new tab.” In this case we would simply right or double click on the Facts tab and choose to open it in a new tab. We can then flip back and forth between that screen and the Hints screen.
What if my ancestor has little or no information to review in their Facts section?
Then you will need to be extra cautious. This is the time when most mistakes in family trees happen — when we are just beginning to explore a new person or when we are examining them after a long pause and we assume a record or tree match is correct when it is not. When we have very little information to go on it is best to take extra time for review.
When in doubt about a Hint, err on the side of caution. Do not add a Hint to your tree unless you are sure it is a match. It could lead to many problems in the future if you find you are incorrect, especially if the Hint includes incorrect parental information. It is better to sort it as Undecided and wait until you have enough information to be sure. We explain how to do that below.
How to Sort Hints for an Individual
Here is a view of a person in our tree that we have very minimal information for – in fact, we only have her spouse entered. Despite this, Ancestry has pulled up several record suggestions for us to review.
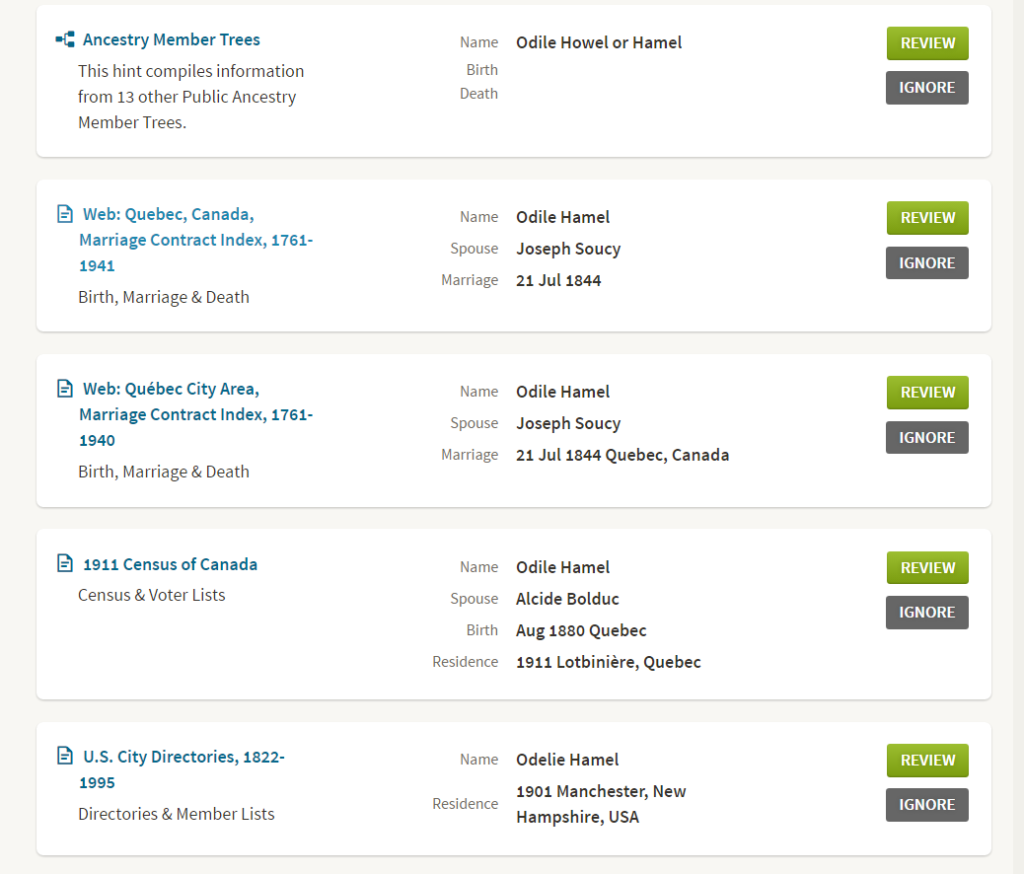
We’re going to skip the Ancestry Member Tree matches for now, since we cover those in our Ancestry course, and focus instead on record matches. In this example we have four Hints to review – two are from Web Collections, one is from the 1911 Census of Canada and one is from a U.S. City Directory.
To make the most of Hints on Ancestry we want to properly sort them so that we can add accurate information to our tree, remove incorrect suggestions, and have easy access to undecided information for future review.
Rather than simply letting Hints that you are unsure of sit on your Hints screen, take the time to put them in their proper categories.
This will:
- allow you to be more organized for future research
- help you make sense of and research the sometimes numerous suggestions being made
- reduce the chance that you will have to review hints more than once
- help Ancestry return more relevant suggestions
In the screenshot below we have already sorted one of our hints into the Undecided area.
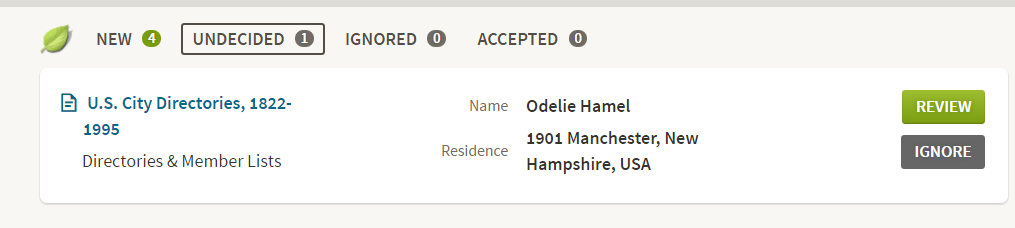
Ancestry makes the sorting process easy, and it is here that your skills as a researcher get to shine. Take the time you need to sort correctly and it will pay off in the end. You will be able to come back and easily review Hints you have already sorted – knowing which ones are worth a second look and which ones are not.
One of the first things we are tempted to do on the Hints screen is skim through hints and “Ignore” anything that looks very misplaced. While it is certainly important to remove Hints that are a mismatch, we must be very careful not to ignore something that could be of interest. Ancestry does not usually give us the information we need to decide on a Hint from this screen, so take a moment to review each hint on the record screen by hitting the Review button and by viewing the record itself – even if it seems incorrect.
One very good example of this is the 1911 Census of Canada Hint shown in the screenshot above. At first glance, this record looks like a complete mismatch. The spouse does not match our person, she is listed with her maiden name in a year long after she was likely married, and the birth date is nearly a half century from where it should be. Although we don’t know the birth year for this person, we know her son was born in 1853 and we can estimate a possible birth range from that (abt 1808-1838). Based on this information we can assume that this is not a match.
However, this record has a serious transcription error that is not apparent on the Hints screen at all. The actual spouse for this person, as listed in the census, is Josephat Howel. Somehow the person who is listed first on the census sheet, Alcide Bolduc, was named as her spouse and as the father of the children in index. Upon further review, it is clear that this is not the only 1911 Census of Canada where this mistake happened.
Although the record does turn out to be a mismatch for our person, this example illustrates how misleading the summery for a record can be and the importance of taking the time to review each record. This record may still be valuable to us since certain commonalities may mean that this person is related in some form – and we can learn a lot about our ancestors from their relatives. You can save records like this to your Ancestry Shoebox for future review.
To properly review the information for a record just click the name of the record itself or the “Review” button. Ancestry will present you with the record landing page, the question “Does the NAME in this record match the person in your tree?” and three options to choose from – Yes, No or Maybe.
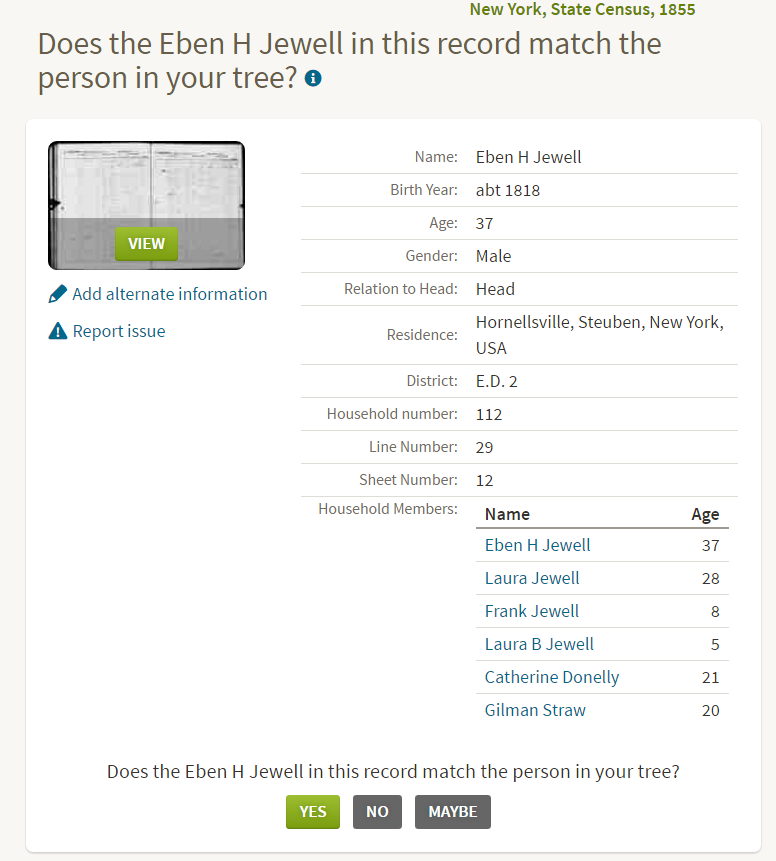
Once on this screen, take the time to view the actual scanned record when available (or leave the site and view it externally if Ancestry links to it). The actual record almost always contains additional valuable information that will help you decide if it is a match.
Take as much time as you need here and pay attention to every detail. Review what you already know and think critically about what you are being presented with. Does the information make sense for your ancestor? Do dates and names fit with what you know? If not, are they reasonable alternatives?
If you feel that you have a mismatch then you can select the No button at any time and Ancestry will place the record in the “Ignored” section of your hints. This can also be accomplished by clicking the Ignore button on the main Hints screen as mentioned above. Ancestry will store Ignored Hints for awhile and then, generally, remove them.
If you are unsure about a record, mark it as Maybe. This will place the record in your Undecided area for future review. You might easily find that, after collecting a bit more information about this person, you are able to make a better judgement call about that Hint. It will not disappear so use this option whenever you are not sure about a match. Come back and review Undecided Hints when you gain new details about a person.
When and if you do decide that you want to add a Hint to your tree, you can select the Yes button and you will be brought to a page that allows you to add information from that record to your tree.
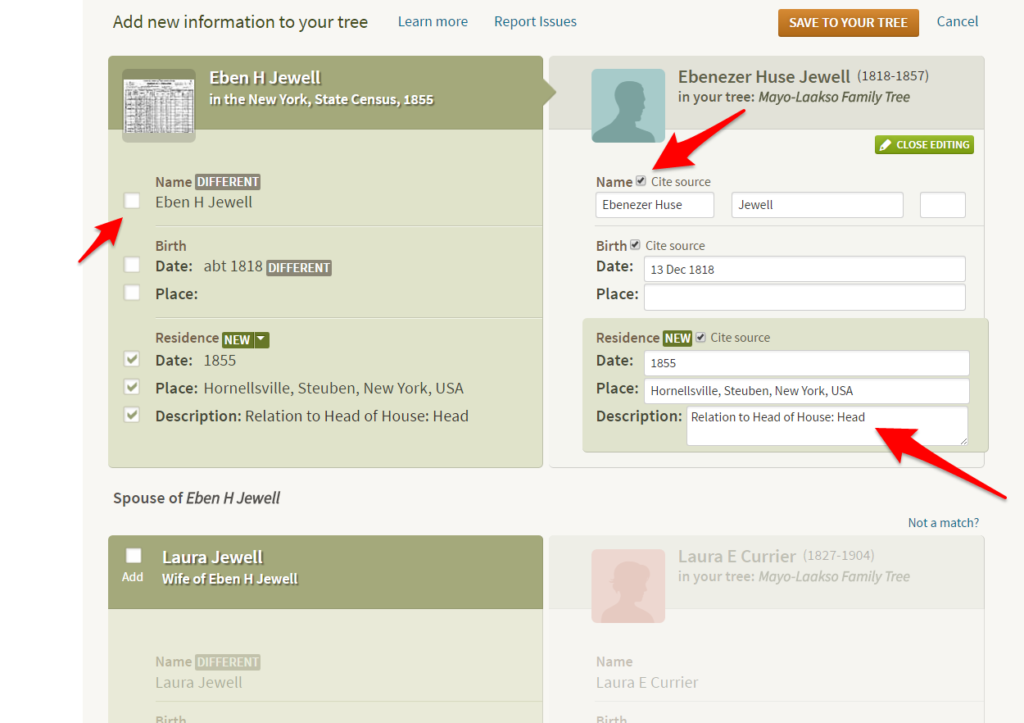
Be careful here since, very often, the record information (either from the original record itself or the transcription) does not match what you have in your tree.
In the image above you can see that the name of our person is listed as Eben H. Jewell, a nickname. We do not want to select the checkbox next to this name as it will then replace the name in our tree, which is his full name.
Instead, we want to leave the boxes unchecked and check the box next to “Cite source” instead. This will not replace the name with the information from the record but it will attach our new source to it, showing that we found similar information in this record that matches our current information. Having multiple sources for any one fact is the best way to prove that it is accurate.
Of course, if you believe that the information in the record is more accurate than what you have in your tree you can add it in place of your current information – but only do this if you are sure and pay attention to minor changes in spelling that may be present.
Review each possible new or altered fact carefully on this page and decide what to include. In our example above, the checkboxes next to Residence are left checked because this is entirely new information we want added to our tree, however we can change the Description to more accurately reflect what we have found. For instance, we may want to add the occupation that was listed in the census. This will ensure that we can more easily review this information in the future and that the source for this information is properly attached.
Scrolling down on the review page for a record we often see that spouses or children are also listed. We can review and add those people individually as we see fit – ensuring that the information is properly added to correct individuals. Ancestry often suggests that a person may be New when there is already a match in your tree.
When you have completed your review select Save to Your Tree to attach the information. The details will now be added to your person’s Facts page and the source will be added to your list of Sources on this same page.
How to Save an Ancestry Record to Your Computer
The first thing you will want to do after adding this information to our tree is to save the actual record image to your computer. Find help for backing up Ancestry records here.
For now, simply look for the new source in your list of Sources on the Facts page and select View.
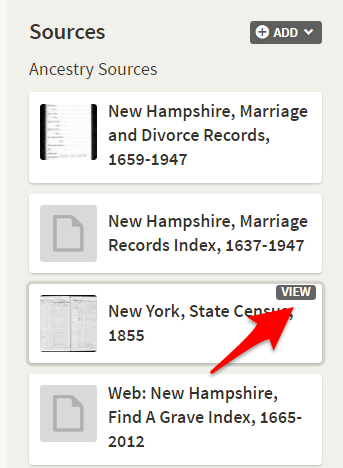
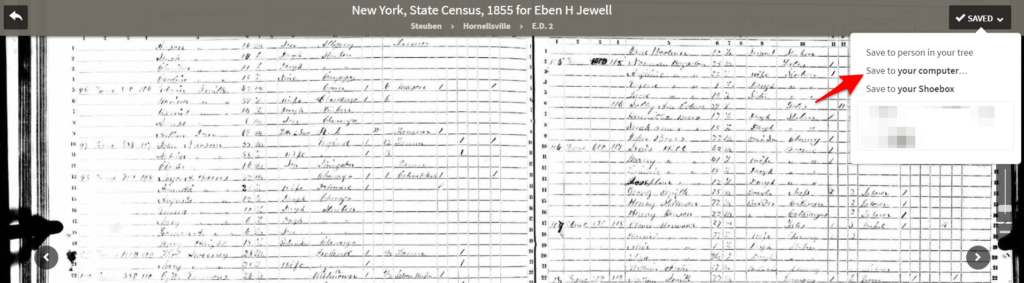
After selecting the View link, click the image of the document presented to you and look for the dark “Saved” button in the upper right hand corner. This button may also be green if you have not actually attached the record to your tree, or may be replaced with the Yes, No or Maybe options if it is a hint and has not yet been reviewed. This is why we suggest that you wait until after you have attached the record to your tree to save it – it makes the process much cleaner.
Click on the Saved button and then select Save to Your Computer to download it. As mentioned, we will go over this in more detail in a future lesson – but it is important to take this step to preserve your research for the future.
If the record does not have an actual scanned image than you can also take a screenshot of the index or transcription and save that to your computer. Programs like Evernote’s screen clipper tool make this easy.
Whether you intend to screen clip a transcription/index or print it, it is best to use the printer friendly version Ancestry provides by clicking on the printer icon/button next to the Save or Yes, No, Maybe buttons in the upper right on a record screen. This version provides all of the pertinent details of a record and is also a good complement to downloading the actual scanned record since it will remind you where you got the record from and what collection it was contained in.
Add Additional New Facts
After you have added the Hint to your tree and saved the record to your computer you may want to pull some more of the new information you have just collected into your Facts page. Ancestry will only include some of the information from a record in your Facts and, while the information is stored in the source itself, it is not very easy to see this way.
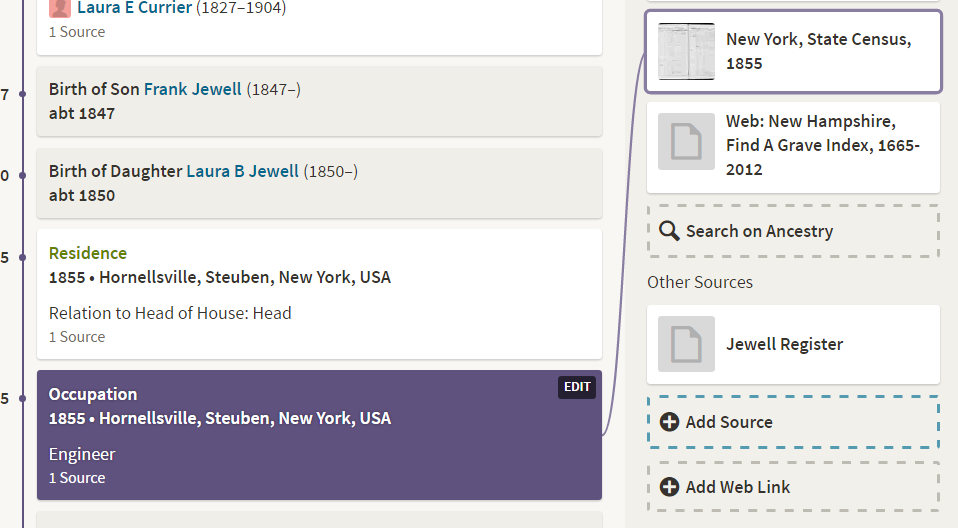
For instance, the 1855 New York Census we added listed Ebenezer’s occupation and birth location – neither were added by Ancestry during review. We will add the birth location manually by editing the Birth section in his profile. And although we did include the occupation in the Description box when reviewing our Hint – we also want to call this information out specifically so it is easy to see for the future.
To do this we will look for the Add button on the Facts page.
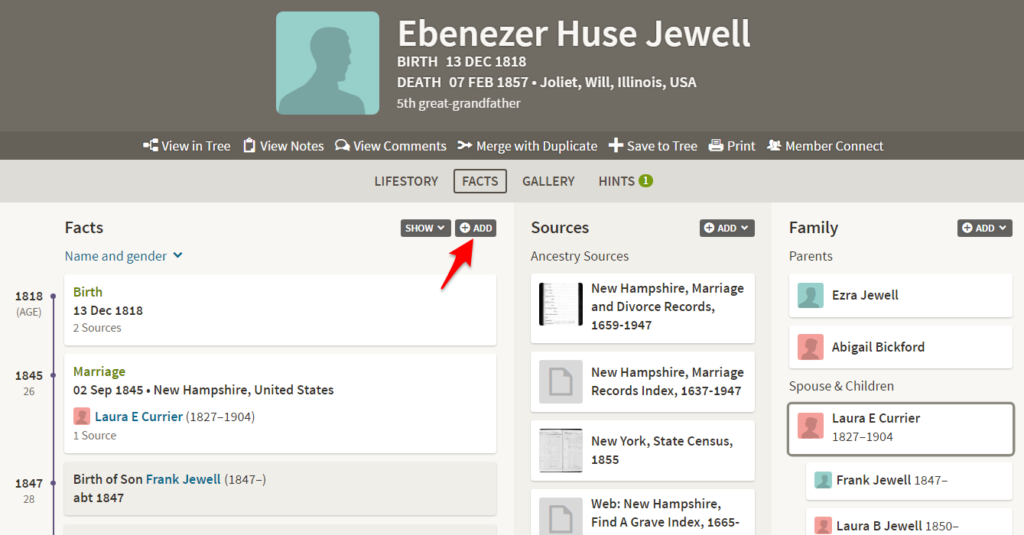
Click on this and select your new Fact from the dropdown. We selected Occupation and then filled out the information we found on the original record – careful to make sure the town’s name and county are listed correctly and in the right order.
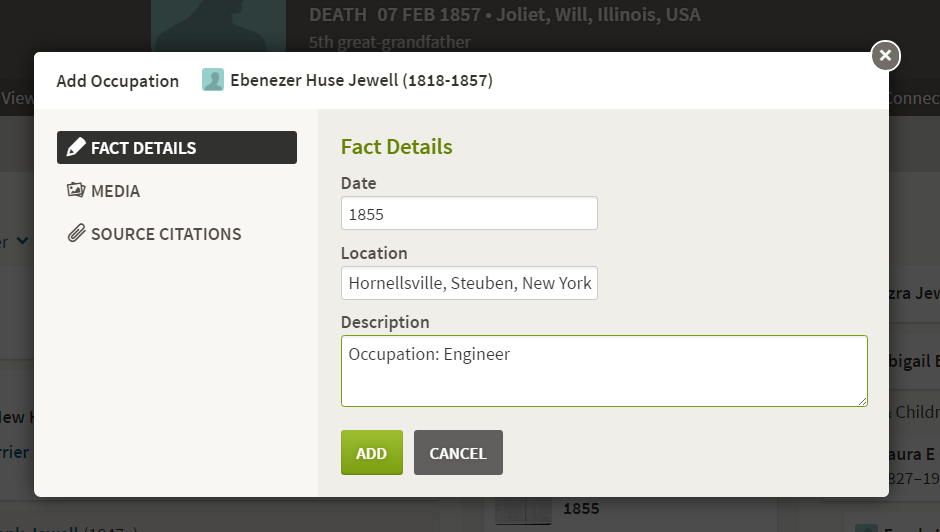
Next, select the Source Citation link on the left and choose the source you pulled this information from by hitting the plus button. In this case it is the 1855 Census of New York. If your source is external you can attach the record though the Media link. We will go over this in our Sourcing on Ancestry lesson.
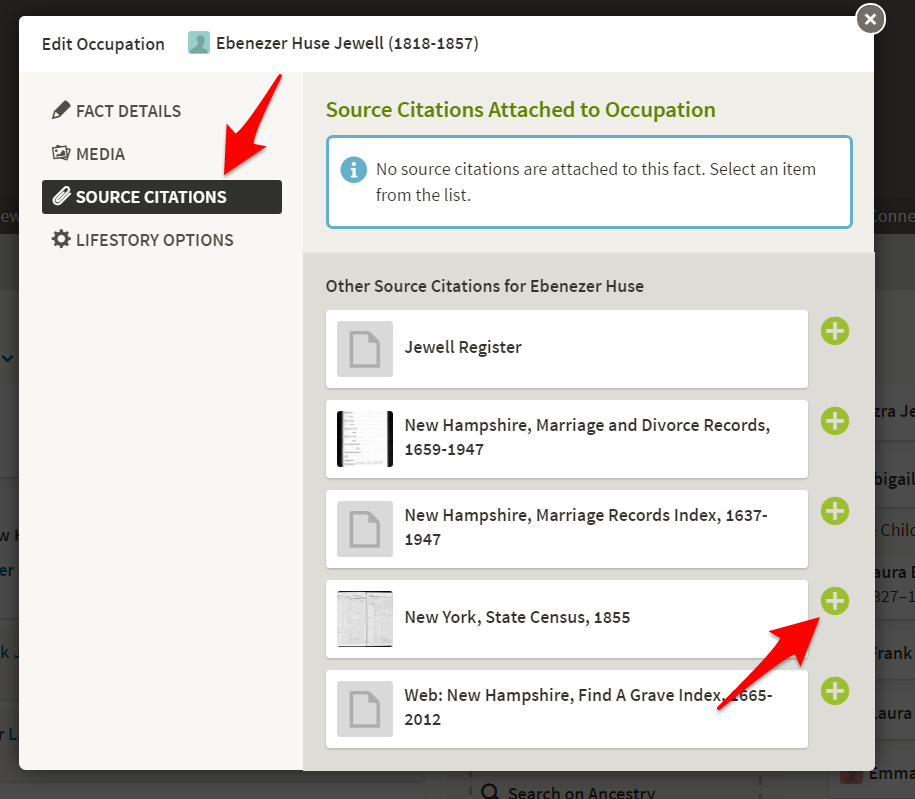
The source will now be added to our new fact as a source citation and we can simply hit the X to close this window. Our new Fact is added to our tree and connected to the proper source as seen below.
Do this for as many individual facts from each record that you think are important to call out on their own. This will make sure your tree is full of rich details that are well sourced and can be easily reviewed, expanded on and shared moving forward.
Find more help for using Ancestry in our online courses.
You May Also Like to Read:
It is such a shame that hints cannot be switched off for selected relatives or individuals.
Having a fairly substantial tree now, and not having the time to deal with hints as they pop up, I now have nearly 1,000 hints, many for the siblings of forebears who I want on my tree but for whom I have no interest in developing their trees.
The huge backlog of hints is actively discouraging me from returning to my tree in Ancestry. I spent two full days trying to get my list down but, after two days, I ended up with more hints than I started with! I eventually marked as undecided the hints for everyone who was not a direct forebear, grandparent, Gt Grandparent, Gt Gt Grandparent etc.
I wold just love t o see a tick box on each person which indicates to the Ancestry search engine if I want hints for this person or not.
Please consider this enhancement Ancestry; as the huge list of hints is driving me nuts!
Thanks for catching this Howland. That spot should read “that we” instead of “the we.” I have corrected it in the article.
It is not surprising that the 1911 Canadian census for the province of Quebec lists the wife by her maiden name, since in French cultural countries, she keeps it as her lifelong legal name. I have even seen it in the English speaking areas if the enumerator was used to French ways. KMC
In the section on not adding the name but adding the source, you have, “This will not replace . . . source to it, showing the we found similar information . . . .” What words should “the we” be; I am having trouble guessing