This sponsored article is provided by our partner Photomyne, whose support helps make the free articles you read on Family History Daily possible.
Do you have boxes upon boxes and albums upon albums of old photos sitting somewhere at home? Whether they are prominently placed on a living room shelf, or tucked away and collecting dust in storage, it’s time to get those treasures digitized. And we’re here to make it easy.
Photomyne’s revolutionary scanning app, Photo Scan (which has been popular with Family History Daily readers for years), makes the job of scanning photos quicker and easier than ever.
The unique app:
- auto detects and perfectly aligns photos for scanning
- can scan multiple photos at once and auto-separate them
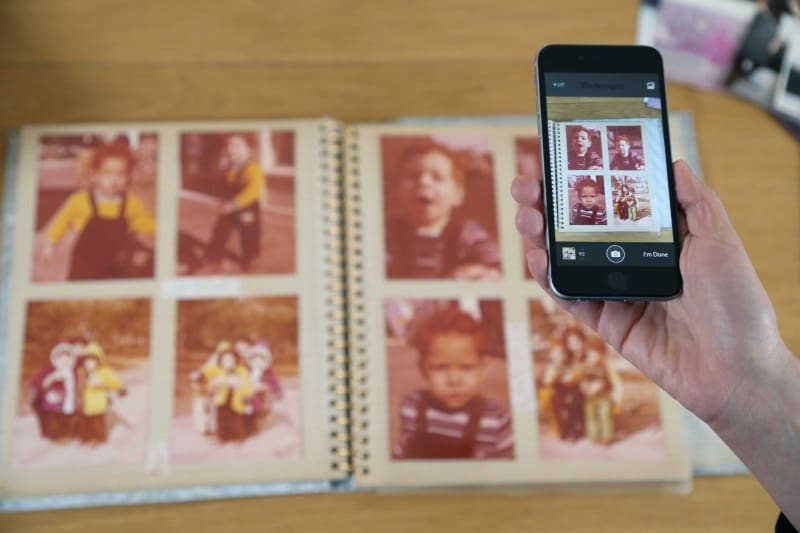
- doesn’t require you to remove your photos from an album
- can optimize, enhance and colorize photos
- allows you to easily record details from the back of a photo
- keeps your scans organized in albums, collages or slideshows
- allows storage on your phone or in the cloud
- provides a voice note option
- applies face tagging to help you identify and sort scans by person
- is super easy to use
- and produces beautiful results!
Photo Scan is free to download (with inexpensive upgrades for unlimited tools) and simple to use. In the following guide you’ll see just how to get started with it on any smartphone or tablet.
How to Scan Your Old Family Photos With Photo Scan by Photomyne
If you’re staring at a huge mess of photos it might be daunting to get started. Don’t worry, you’re not alone. With this guide, you’ll soon be able to quickly scan your photos so you can access those memories whenever you want – and share them too!
First, let’s talk cost. Photo Scan is free to try (so you can decide if you like the process) but a reasonably priced subscription can be purchased if you want to take advantage of every feature. This includes unlimited scanning, photo optimizations, cloud storage and the ability to view photos from all of your devices (or share them!).
Without the subscription, you can still scan a select number of photos and try the features, but many will lock once you’ve reached the limit.
If you’re ready to give it a go, you’ll need to download the app from either Google Play or the App Store. Just click the links we’ve provided and we can move on to the fun part – scanning!
Now, choose a few photos, or an entire album, and get them set up on a flat, clean surface in a bright space. Daylight is best.
Open your app, face your phone at the photos or photos you want to scan, and hit Start scanning. That’s it. The scanning itself is quite easy, requiring only a tap and hold of the shutter button. This makes it extra easy to move from photo to photo without much hesitation.
Unlike taking a shot of a photo with your phone’s general camera app, Photo Scan auto-crops the images so you don’t have to take the time to do it yourself. If you’re not happy with how a scan turns out, you can always retake the shot or adjust the cropping to your liking.
Auto-cropping also works with multiple photos at once for those looking to quickly digitize. Just point your device at an album page, or multiple photos on a flat surface, and scan. The app will separate out the photos for you. This is perfect for when you are short on time and need to get through a bunch of shots (such as at a family gathering).
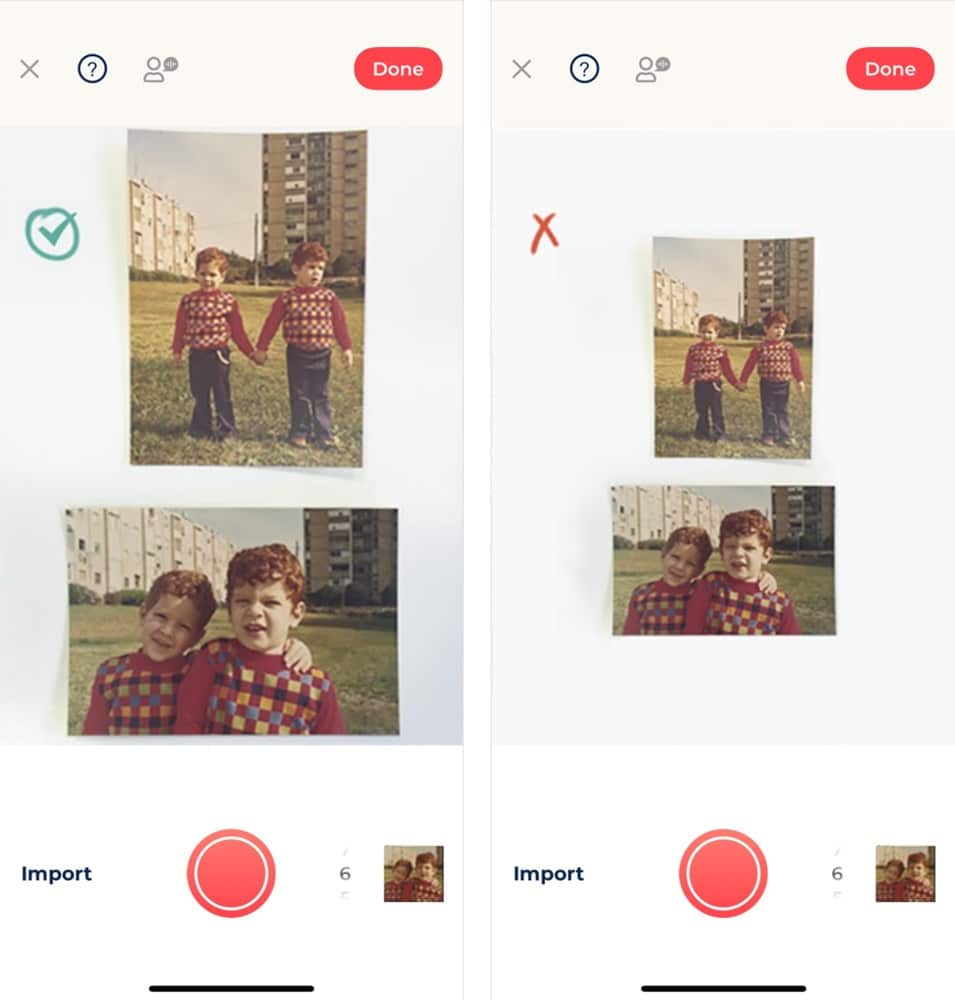
Photos scanned together will still scan at a high quality, however the photo resolution does decrease with each additional photo so it’s recommended to keep your scans to three or fewer if possible. If you’re more interested in the highest-quality images, stick to scanning one at a time as the app still makes it easy to move quickly through your albums.
Getting the perfect scan can occasionally be tricky due to a variety of factors, but with the right conditions, and a few minutes to learn how to get the best results, you’ll be on your way to great looking scans of all your old family photos.
Follow these tips for the best results:
- It’s best to scan printed photos with lots of daylight and little overhead artificial light to avoid glare – if it’s a nice day, try scanning outside. Try different lighting angles and positions until your scan is glare-free.
- Take photos out of their plastic coverings if possible so it doesn’t cause a glare of its own. This is not required, but recommended.
- Try to scan with your phone as parallel to the photo as possible to avoid any funky angles and distortions to the scanned image.
- Make sure your scanning surface is smooth and even-colored so the app’s AI doesn’t misidentify the photo’s borders.
- Capture your scans from as close to the image as possible with narrow margins. This goes for both scanning a single image and a group of photos.
- If you’re struggling to keep a steady hand, use the handy voice command feature to capture your scans. All you need to do is say ‘Go’. You can even place your photo on a tripod if you have one and scan this way.
- The app automatically restores a photo’s color, but you can also choose from additional color filters to amplify the picture and add a creative touch (or even colorize black-and-white photos)
Once you’re satisfied with your scans, tap Done and all of those photos will be saved in an album together.
You can even save the details of a photos once scanned.
Scanning your photos might be the meat and potatoes functionality of the app, but don’t overlook the importance of organizing and saving your photos with details. There’s a peace-of-mind in knowing exactly what’s going on in each album and photo, especially when sharing them with others.
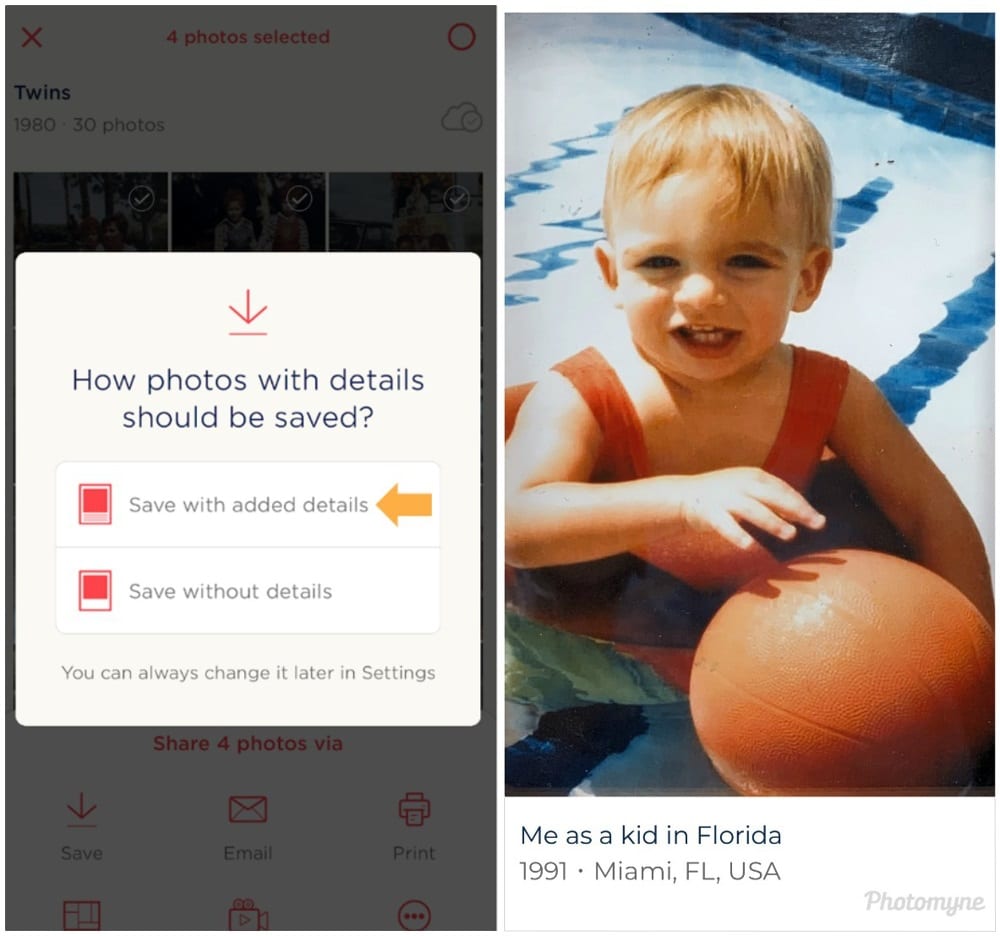
Adding an album title, dates, locations, and people in the photo will give an album more context when organizing decades of photos. You can also record up to a 60-second voice note for each album.
You can go even further for individual photos. Not only can you add the date and location, but you can also fill out a description of what’s happening in the picture so its story can be saved along with it.
For those of us that wrote details on the flip side of the photo back in the day, you can scan the back of the photo too. The app will then save any written text into the photo’s description.
Lastly, the face-tagging will connect the automatically-identified faces with the name you assign to it. The more details you add, the easier it will be to search for your photos.
What about storing and sharing your scanned photos?
The premium version of Photo Scan offers integrated cloud storage for all of your photos, and this makes it simple to back them up and share them.
Plus, it’s just nice to remove the burden of saving tons of photos to your device. With cloud storage, you’ll know that you can access them anywhere and, no matter what happens to your device or physical collection, you’ll always have them.
If you want to save your scans locally, you have that option too. You can either save them directly to your device or send them in an email. In either case, you’ll have the choice to save the photo with details.
Depending on how creative you want to get, there are also a couple of options for presenting multiple images together. For an artsy vibe, you can choose up to 6 images to put in a photo collage. For a broader spread of photos, you can create a time-spanning slideshow. Each option only requires that you select the images to include and the app will do all of the hard work.
Finally, you can share all of your scans with your friends and family. Individual photos, albums, collages, and slideshows are all fair game. Each can be shared through apps like iMessage, Facebook, and WhatsApp.
For large selections of photos, you can also choose to share via Photo Scan’s email option. All of your selected photos – whether an entire album or a hand-picked selection from multiple albums – will be sent as a web link which opens to a newly created gallery.
Don’t put off scanning your old photos any longer. Download Photo Scan by Photomyne on the App Store and Google Play and start scanning your photos today.
Also check out Photomyne’s newest app – Photo Family Tree – for a unique way to build and grow your tree!


It looks as though I would need the newer type all encompassing new phones. I am retired and did not upgrade to the new generation of Super phones. It appears this scanning app would be useless to me.
How much does a subscription cost
I LOVE the idea and concept of scanning several years of pictures and having most of the work done automatically..
My question is, “Do I have to have them upload to a cloud?” I DO NOT want them going to a cloud..