This post is Step 2 of a 5 part tutorial on creating your own family history blog. Find the first post in this tutorial here, Intro and Step 1 — or quick jump to Step 3, Step 4 or Step 5.
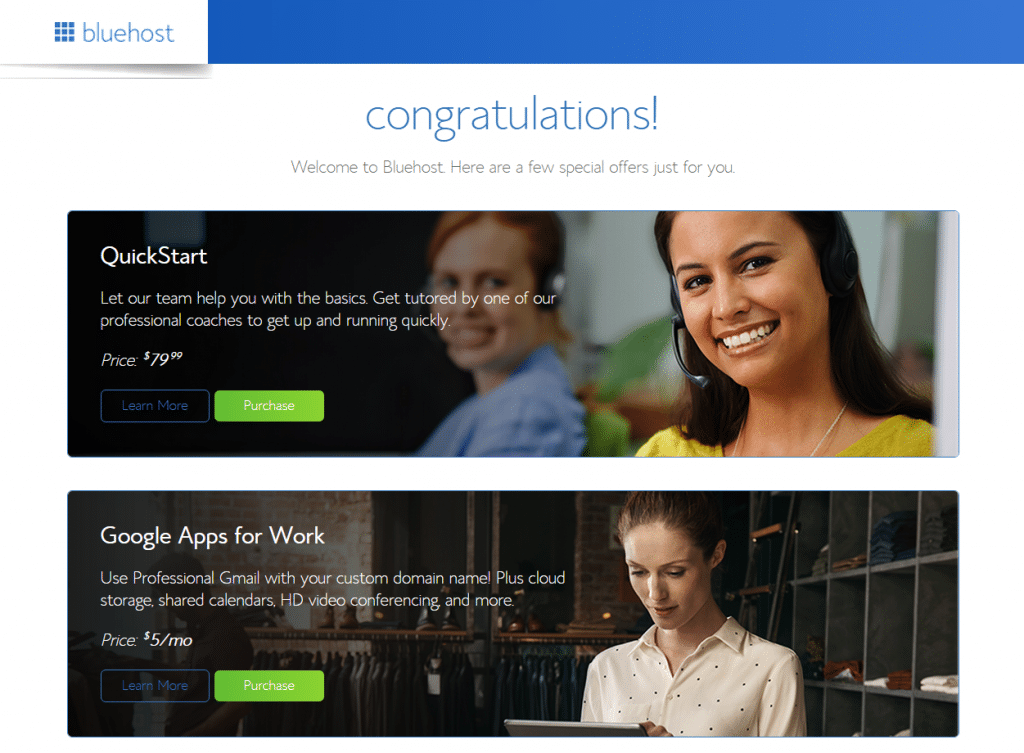
Now that’s you’ve completed sign up in Step 1 and officially own a web hosting space and domain name (wow!) you’ll see a landing screen like this. Just skip the special offers by clicking ‘No Thanks’ on the bottom right of the screen.
Disclosure: Family History Daily receives compensation when you sign up with BlueHost as your web host. This helps us support the site and keep it running. However, all of our opinions here are our own. BlueHost is known to be a very reliable service, has been around for many years and is trusted by many small, medium and large websites.
Next you’ll be taken to a page where BlueHost will ask you to set up a password. Click the blue button to do this and a new tab or window will open. Type in your password, agree to the terms, and then continue.
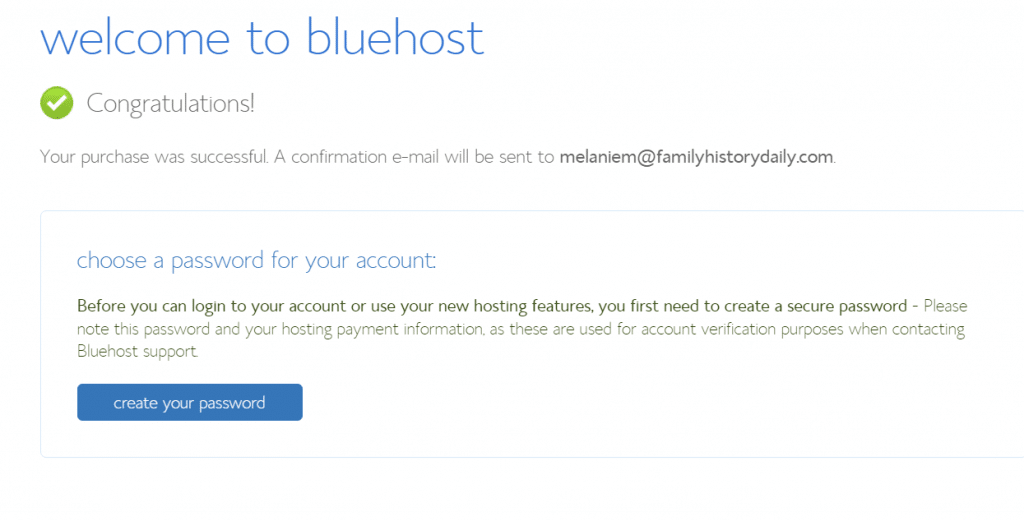
Remember that BlueHost will now charge your credit card yearly for the website hosting fee and domain name renewal (usually about $15). Make sure you keep your payment information up to date by logging into your account and updating this information regularly if you need to.
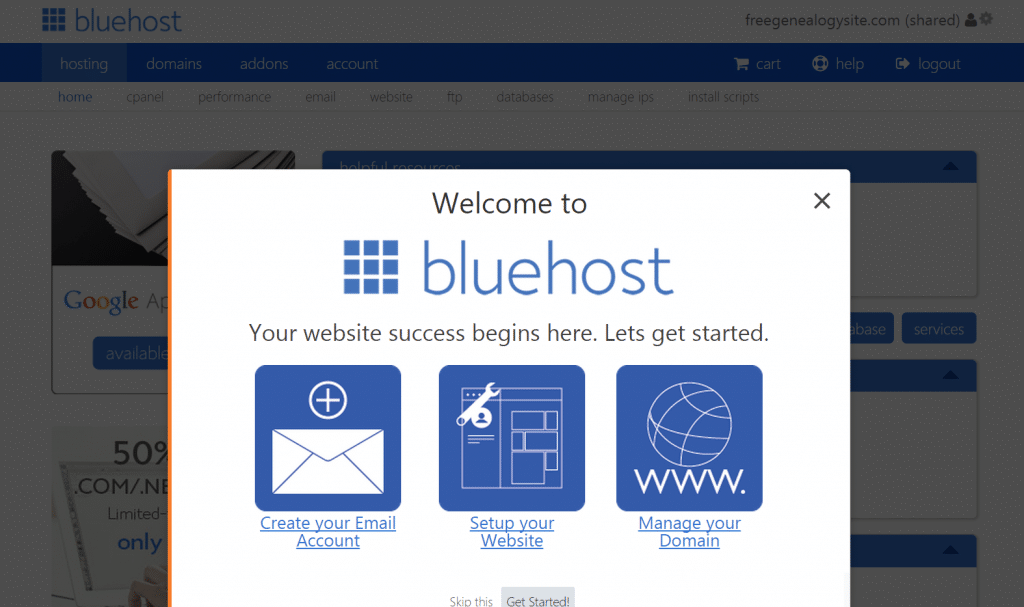
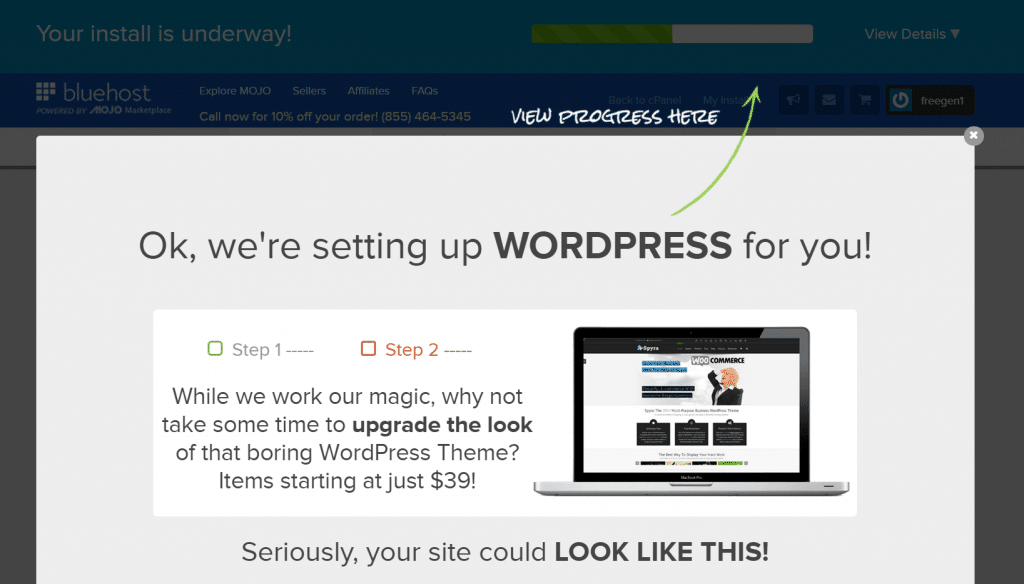
You can simply close this popup.
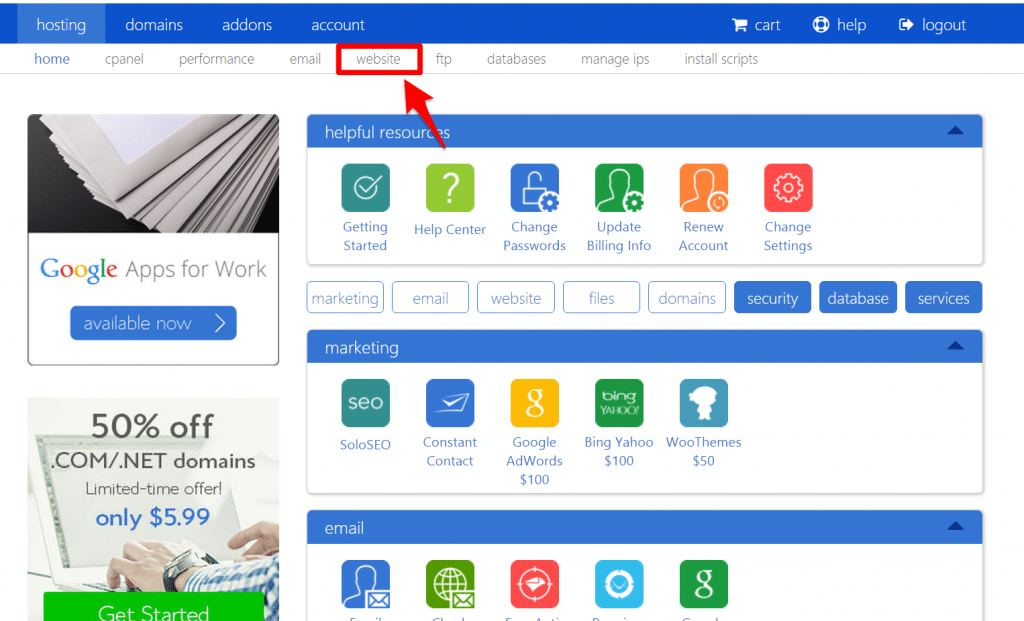
Now, look for the ‘Website” link in the menu at top.
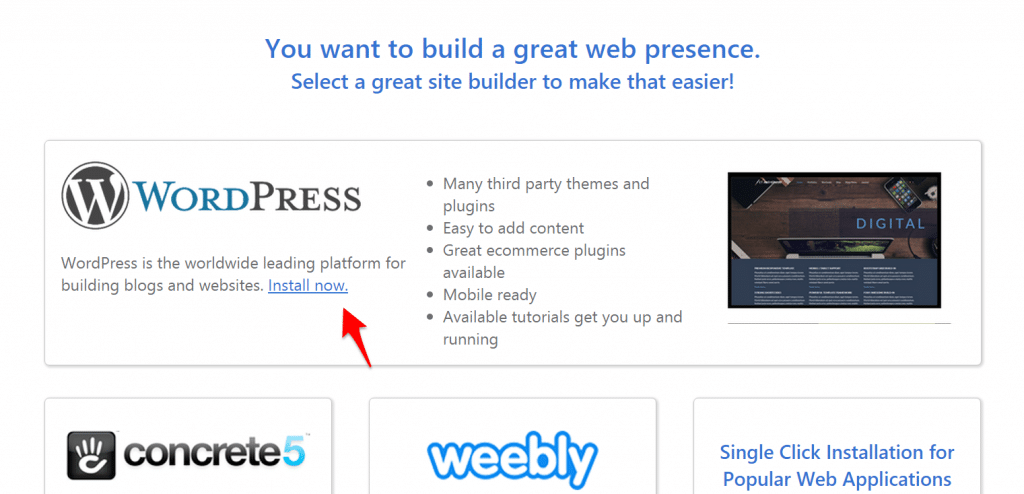
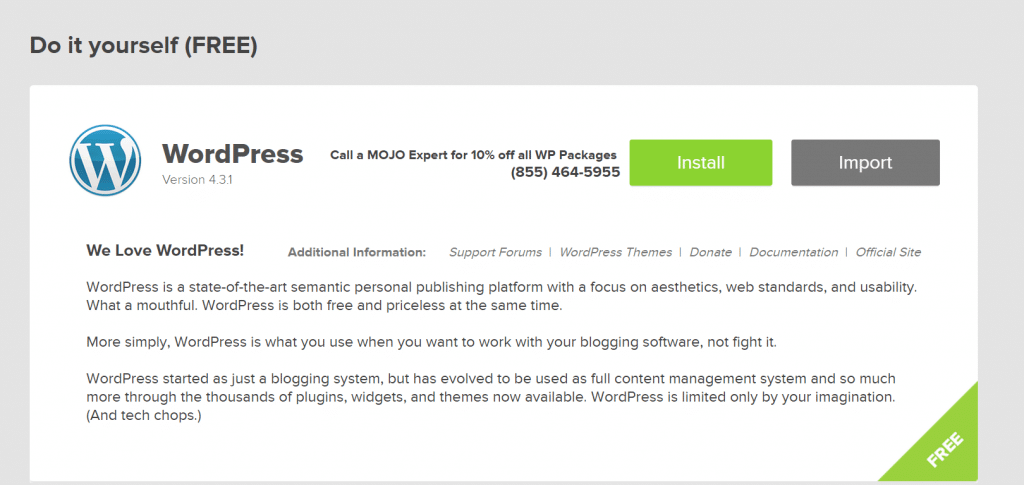
Once you have clicked on that you will see a page with a large ‘WordPress’ box. Hit the ‘Install Now’ link.
This will take you to a WordPress install page. Hit the big green install button.
The next screen asks you to verify your domain. The one you registered should already be entered. If it is not, do that now and select ‘Check Domain.’
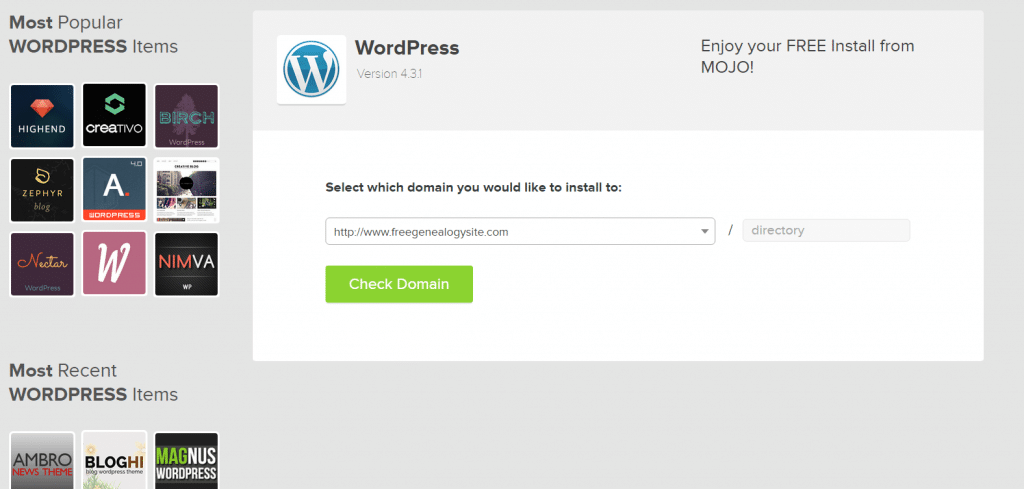
It may take a couple of minutes for this to complete.
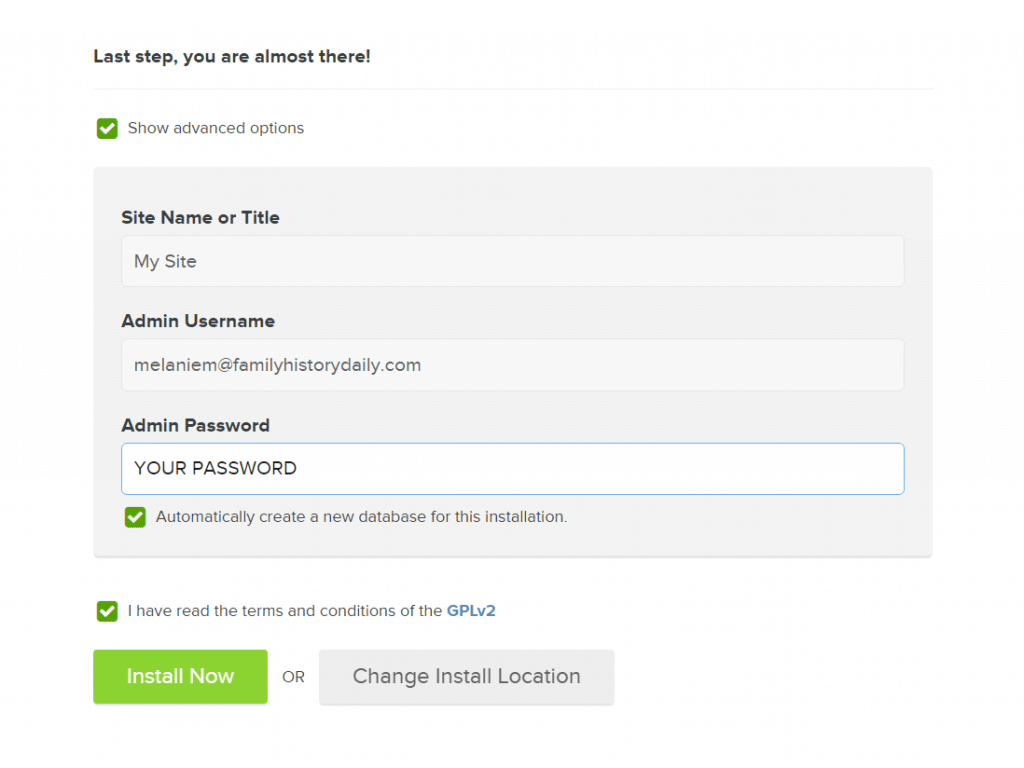
Once you reach the next screen you will want check the advanced options checkbox (see below). Type in a name for your site (ie Anderson Genealogy), your email and a password that you will use to login to your new blog! Make it something you can remember and write it down!
Leave the ‘Automatically create a new database for this installation.’ box checked and also select the ‘Terms and Conditions’ checkbox.
Click ‘Install Now.’
As soon as you install the blog you will be transferred to a page where they will offer you a popup with a wordpress theme (this is a blog design). Just close this popup and ignore the other theme offers. We don’t need them.
You are now done with the setup!! Great job!
Let’s access your new blog!
Go to Step 3 – Make Your Blog Your Own
Head Back to the Main Post – Step 1
Disclosure: Family History Daily receives payment when you sign up for web hosting with BlueHost. This helps us support the site and keep it running. However, all of our opinions here are our own. BlueHost is known to be a very reliable service, has been around for many years and is trusted by many small, medium and large websites. Plus, they have great rates.
